

Hi Guys,
I have recently had the urge to be more creative. So I embarked on my first DIY sewing project to make a Kimono Jacket.
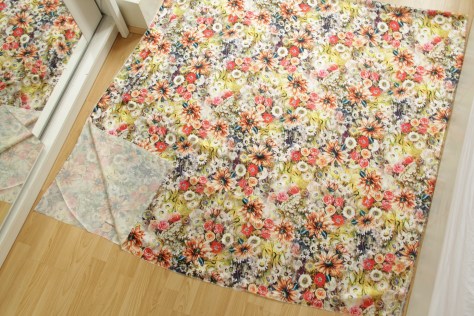
To start with I went fabric shopping. This was so much fun guys. So much colours and textures out there. I don’t know much about fabric compositions but something flowy works well for Kimono’s. I also went for something with florals since this is totally in trend.
Once you have your fabric, you will need the following:

- 2.5 yards of Fabric ( buy more fabric if you want the Kimono to be bigger or longer)
- Sewing machine
- Measuring tape
- Fabric marker or chalk
- Thread
- Pins
- Scissors
Begin by folding your fabric into two. Do this along the longer side of the fabric.
Decide on how big you want the Kimono, then mark iron and and cut downwards of the folded edge. I wanted an over-sized look so I measure mine at 36 inches ( This came out super big so I ended up taking 2 inches off). When cutting ensure you still have enough fabric for your sleeves.
With the remaining fabric measure and cut out your sleeves. I wanted wide and long sleeves these measured 13 inches on the half. You will need to cut two fabrics this size for both sleeves.

You should have the following pieces of fabric cut now. You will notice that I cut a slit in the bigger piece of the fabric. This is the main body of the kimono and the slit will form the front openings/ sides. Do not throw away left over fabrics. This can be used to make a belt or pockets for your Kimono.
I decided to work on the sleeves first. On each piece, I pinned the two edges inside out and sewed. As an additional step I ironed my seams open. This helps with getting that great finish.
I currently do not have an over-locker so I had to double fold and sew all the raw edges on the Kimono to avoid fraying. On the sleeves you only need to do this to one edge as the other edge will be joined to the main body of the Kimono.


You are now ready to attach the sleeves. Insert the sleeves into the Kimono and pin into place. Take care to ensure that the sleeves are the right way in to avoid having them inside out once you have finished sowing.
You should now have the basics of your Kimono.


I decided to cut the neck line as above to add some shaping to the collar.
Finally sew the sides together and neatly bind all your raw edges. And your DONE!
Oh I added pockets and a belt with left over fabrics.
All in all I found this Kimono fairly straight forward to make and I am so thrilled with what I have achieved. One of my biggest challenge was in binding the neck edge because of the collar curve( I could really do with some tips on how to do a better job of this in the future). I am also still working on making my sewing straight but am sure a little more practice will straighten this out. In hindsight I wish I used fabric that was printed on both sides. Am not keen on seeing the plain side showing as am wearing the Kimono.
Ok so…. This is the finished product! Still not sure how an going to wear this on holiday but I put this look together just to show you.

![PSX_20170325_165441[1]](https://allthingstallandplus.com/wp-content/uploads/2017/03/psx_20170325_1654411.jpg?w=474)
![PSX_20170325_165321[1]](https://allthingstallandplus.com/wp-content/uploads/2017/03/psx_20170325_1653211-e1490463032675.jpg?w=679)
Thanks for reading to the end. Please let me know what you think of this look.
If you have any questions or comments you can put them in the comments box below.
Lets be friends – Follow me on Instagram @Ijaykheavens
Outfit details
Playsuit from Zara
Nude Sandals from Marks and Spencer.
xoxox
